Manage Banners
interact
🇪🇸 Si quieres información en español, consulta este tutorial en vídeo (opens new window).
🇫🇷 Si vous souhaitez des informations en français, regardez ce tutoriel vidéo (opens new window).
🇵🇹 Se quiseres informações em português, vê este tutorial em vídeo (opens new window).
🇮🇹 Se vuoi informazioni in italiano, guarda questo tutorial video (opens new window).
🇩🇪 Wenn Sie Informationen auf Deutsch möchten, sehen Sie sich dieses Video-Tutorial an (opens new window).
Click Promotions > Banners in the left-side menu to access the Banners page. It displays all the banners created in your account.
You can then add a new banner or edit or delete existing ones.
Creating banners
You can add a new banner at any point.
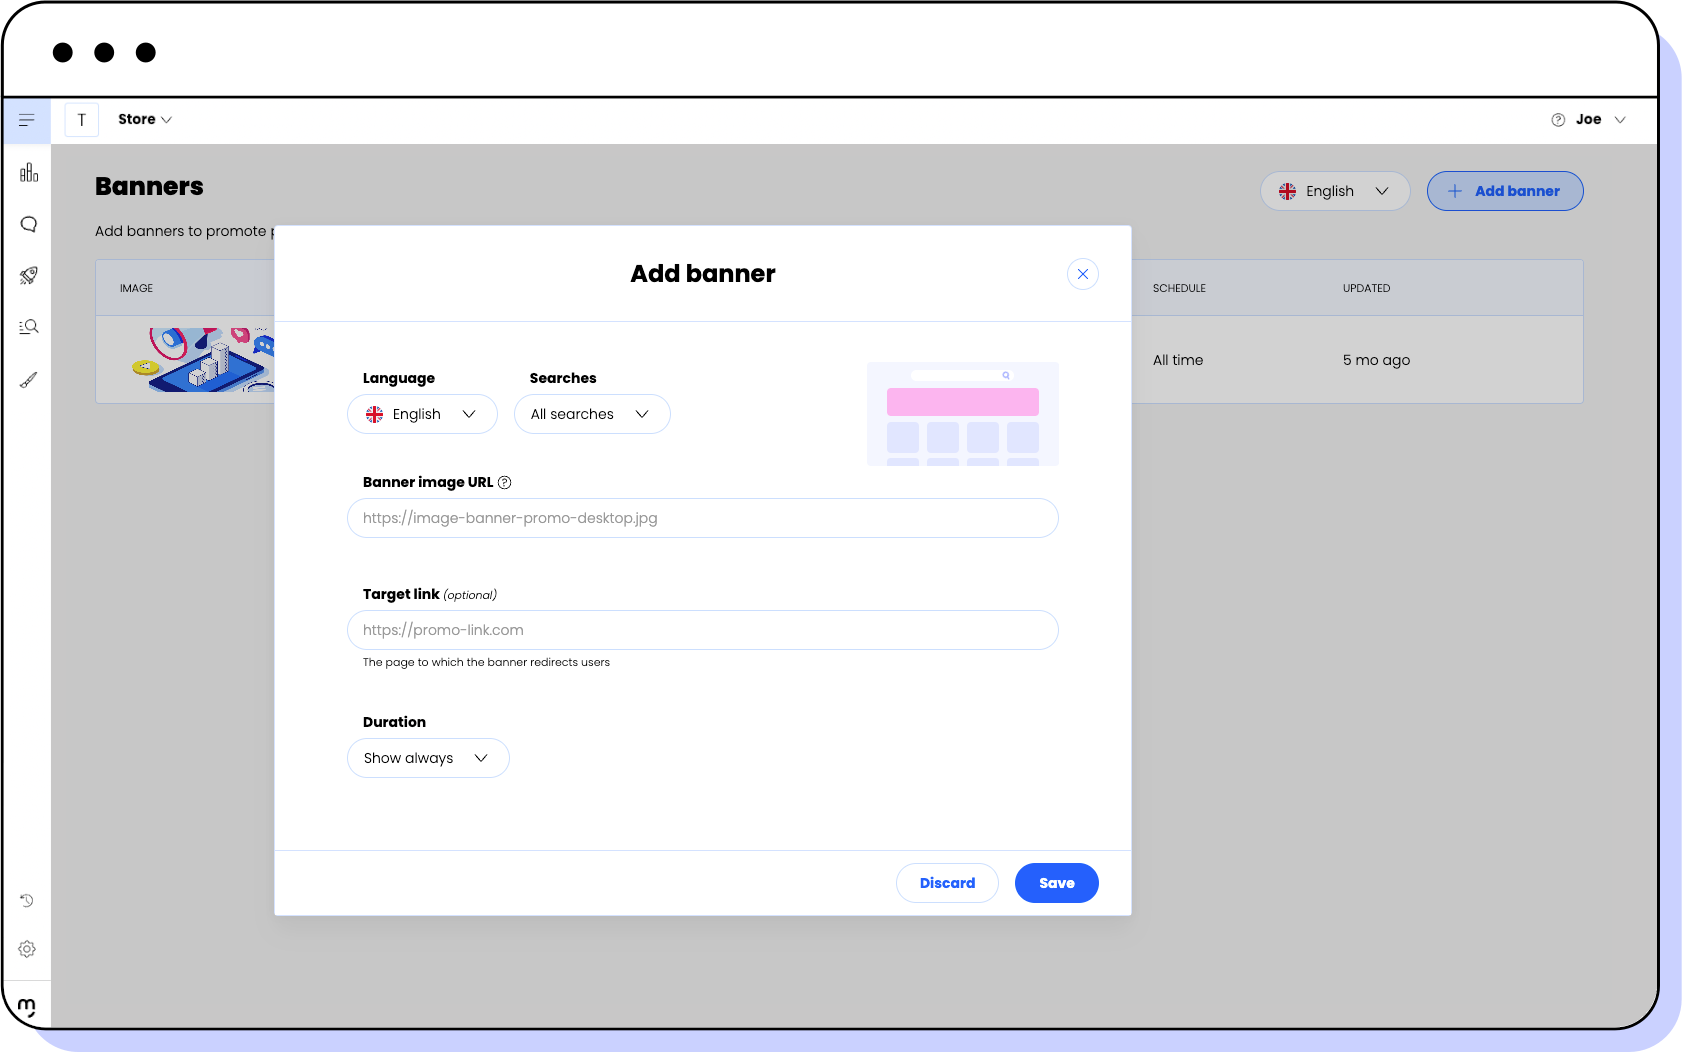
Click Add banner.
In Language, select the language for which you want to create the banner.
In Searches, choose if the banner is shown for All searches or for Specific searches.
note
If you select specific searches, enter in Search terms the search terms for which the banner is visible. This allows you to create specific campaigns for certain items. Hit Enter to save a term.
In Banner image URL, paste a link to the image the banner will display. Note that the image has to be hosted externally.
(Optional) In Target link, enter the URL of the site you want the banner to redirect users to.
Click Save.
A notification appears, confirming that the banner has been saved.
Uploading an image via an image URL
interact
🇪🇸 Si quieres información en español, consulta estos videos para PrestaShop (opens new window) y Woocommerce (opens new window).
🇫🇷 Si vous souhaitez des informations en français, regardez ces vidéos pour PrestaShop (opens new window) et Woocommerce (opens new window).
🇵🇹 Se quiseres informações em português, vê estes vídeos para PrestaShop (opens new window) e Woocommerce (opens new window).
🇮🇹 Se vuoi informazioni in italiano, guarda questi video per PrestaShop (opens new window) e Woocommerce (opens new window).
🇩🇪 Wenn Sie Informationen auf Deutsch möchten, sehen Sie sich diese Videos für PrestaShop (opens new window) und Woocommerce (opens new window).
You can upload the required image to your shop and paste the image URL in the corresponding field when creating a banner.
Here is the procedure for WordPress (opens new window) and below is for PrestaShop:
Procedure for PrestaShop
- Access your PrestaShop control panel.
- Navigate to Catalog > Products and click any item.
- In Basic Settings > Summary, click Insert/Edit image (the image icon).
- In Source, click the icon to the right of the field.
- In the pop-up window, go to Actions and click the icon with a paper sheet at the top.
- Select an image from your computer.
- Once the image is uploaded, right-click it and select Show URL.
- Copy the image URL.
You can now use this URL to create a banner.
Editing banners
You can edit a banner to modify its details. For example, you can modify its banner image URL or its search terms.
note
You cannot edit the language of the banner.
- Hover the mouse over the banner you want to edit.
- Click the pen icon to the right of the banner.
- Modify the required details.
- Click Save.
A notification appears, confirming that the banner has been saved.
Deleting banners
You can delete banners that you don't need anymore. When you delete a banner, it disappears from the search results.
warning
This action cannot be undone.
- Hover the mouse over the banner you want to delete.
- Click the trash bin icon to the right of the banner.
- In the confirmation pop-up, click Delete.
A notification appears, confirming that the banner has been deleted.